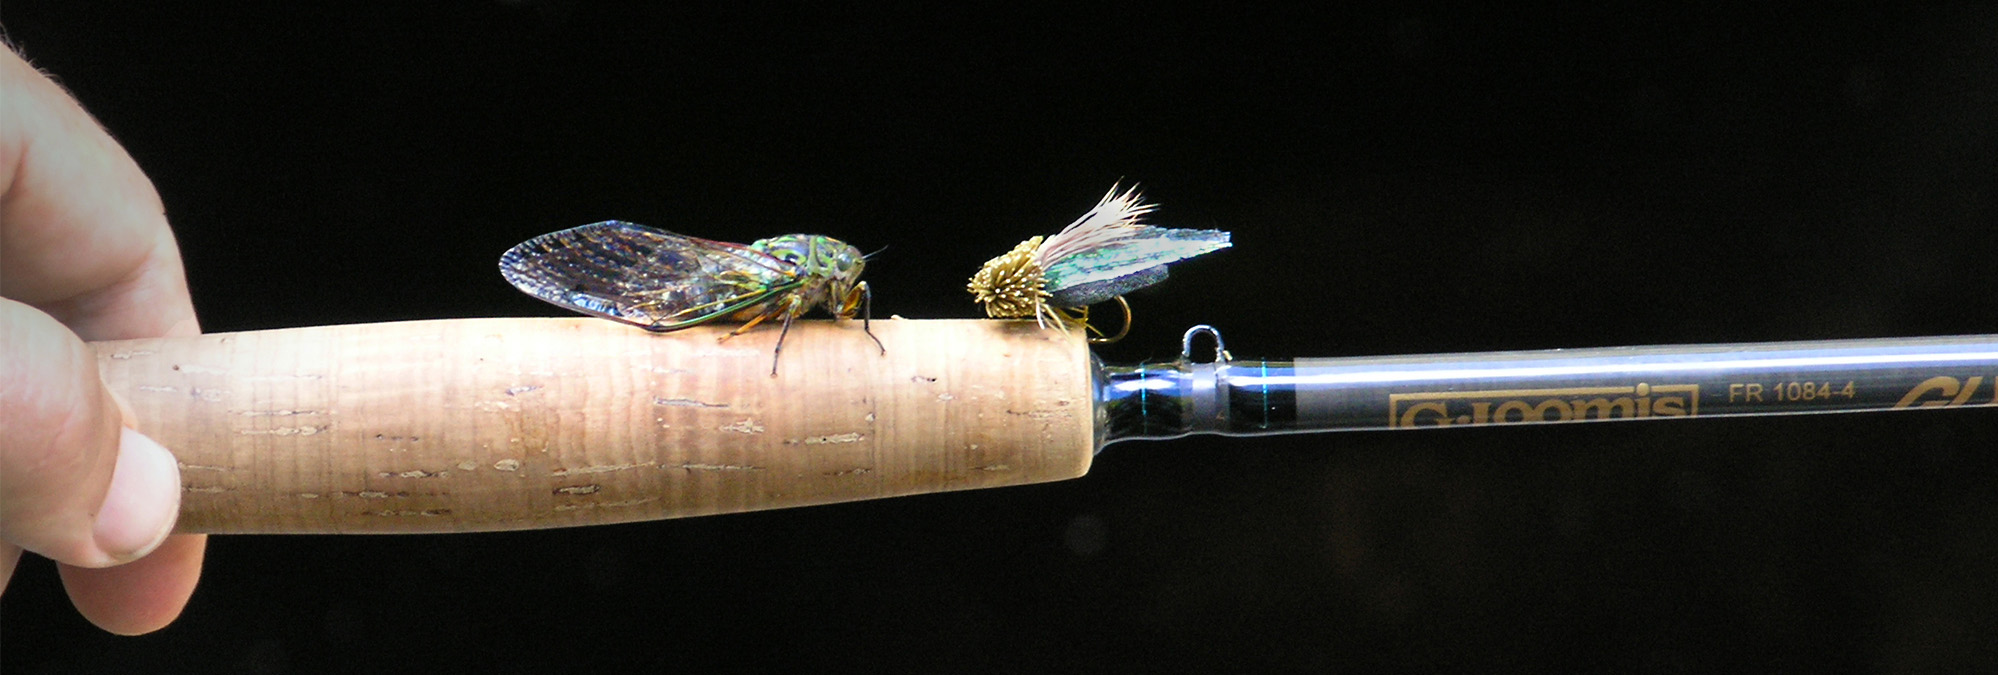

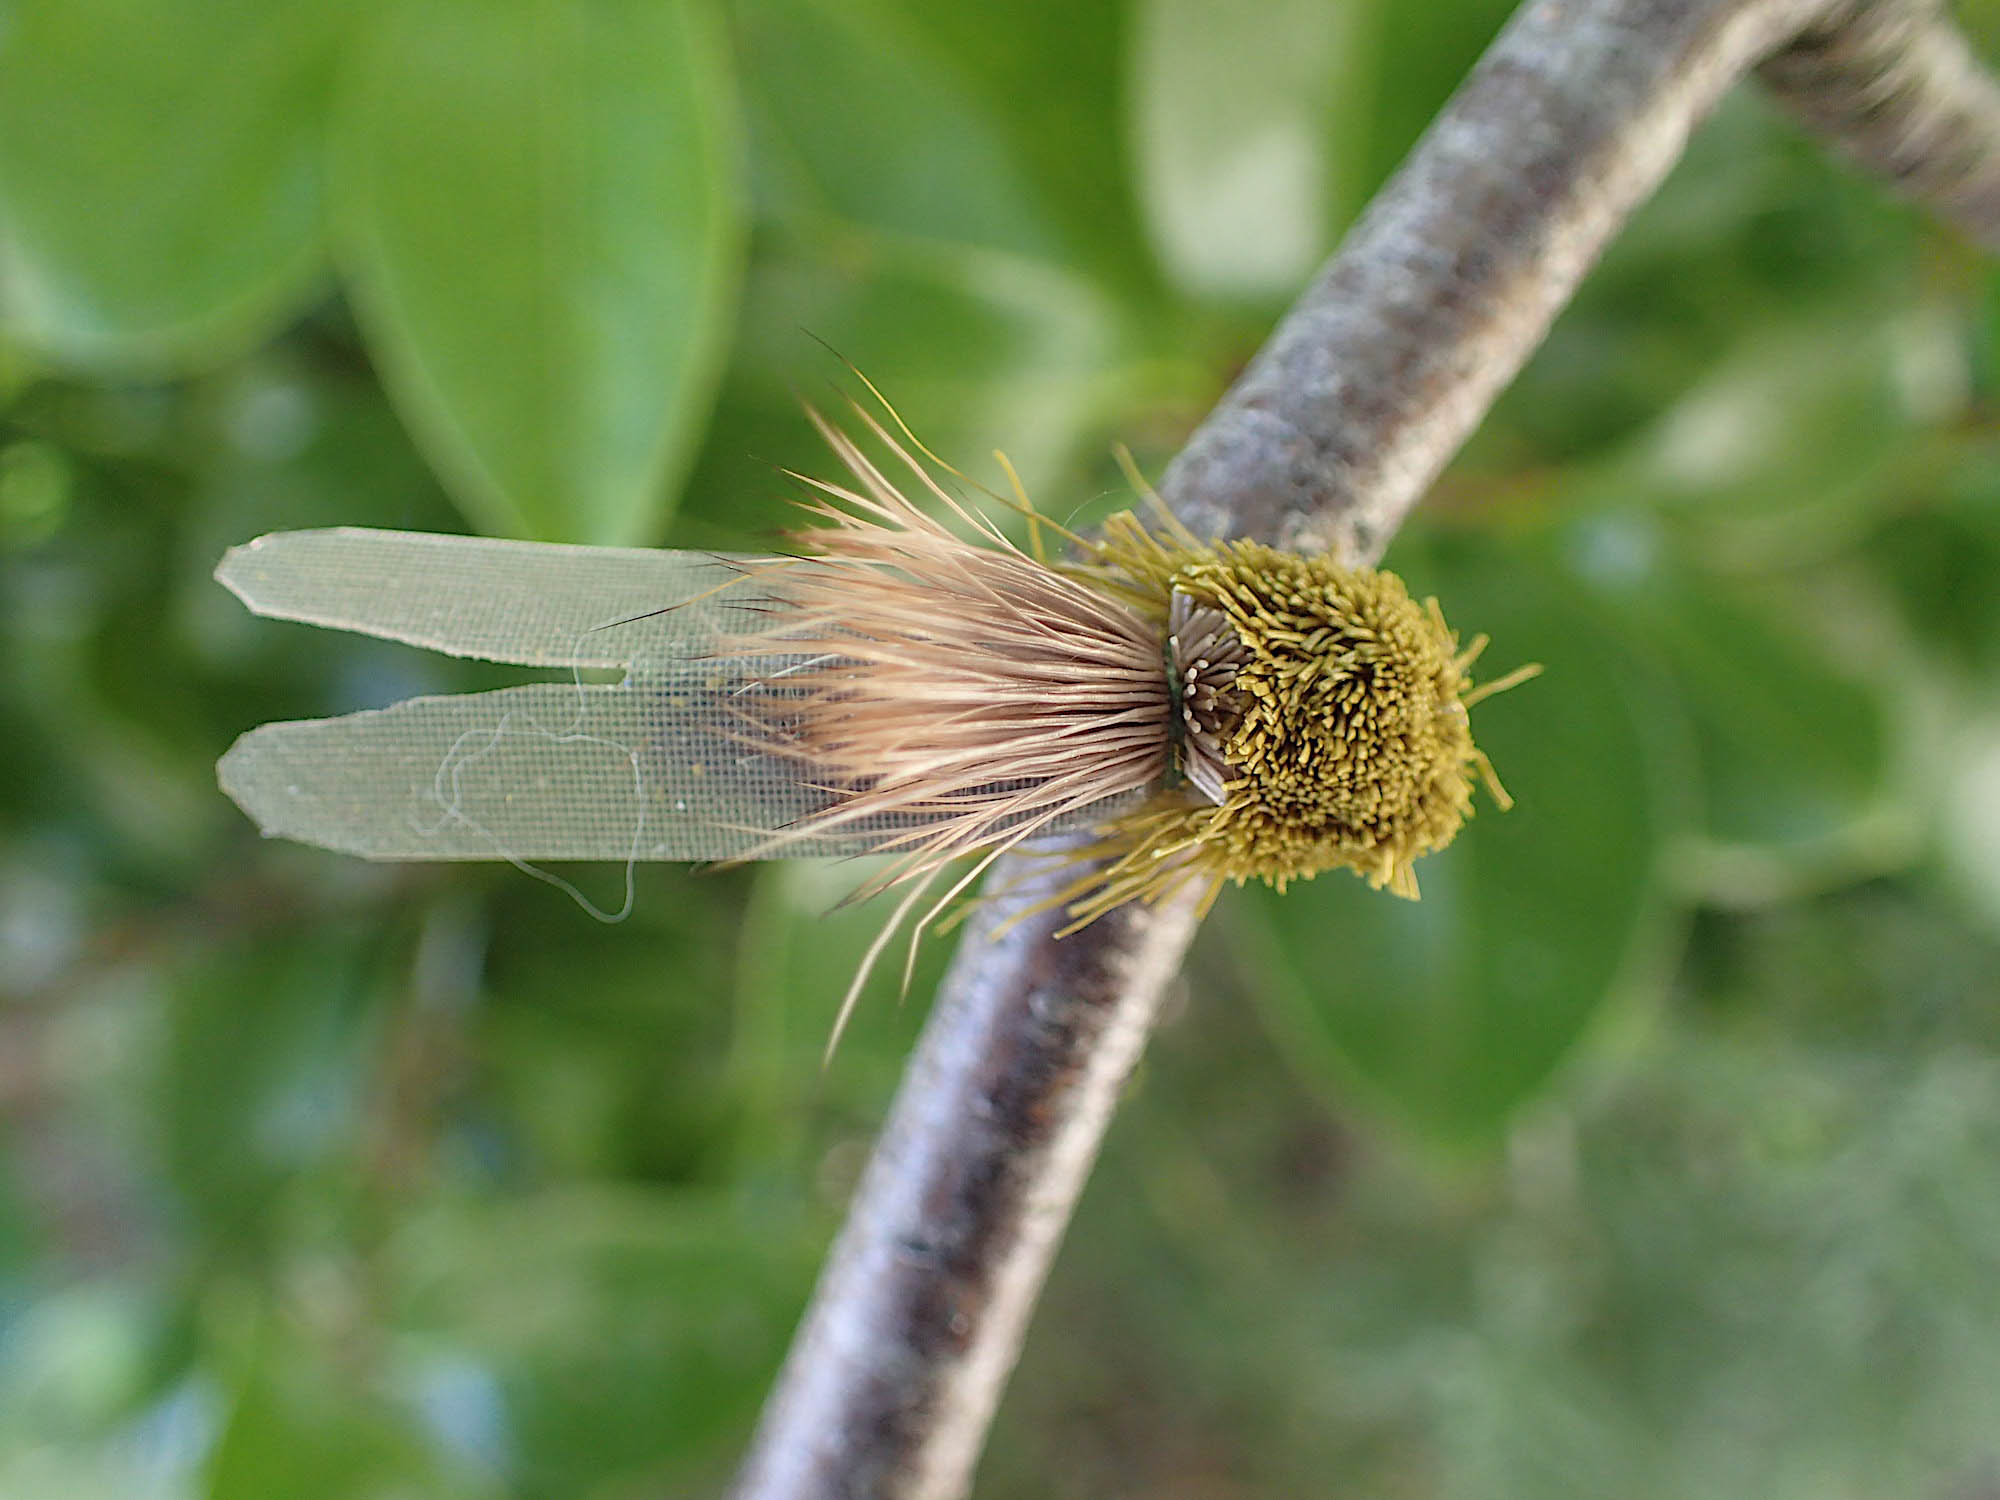
Silicone Wing Cicada - Size 8
HOOK: TMC 100, size 8
THREAD: Kevlar UTC 190 denier
ABDOMEN: 18 mm length of 8 mm diameter black high-density foam cylinder
WING: One strip of tan or grey silicone organza wing material, 10-11mm wide and 30mm long.
OVER WING: Natural cow elk hair
THORAX: Olive deer hair
LEGS: A few strands of deer hair trimmed long

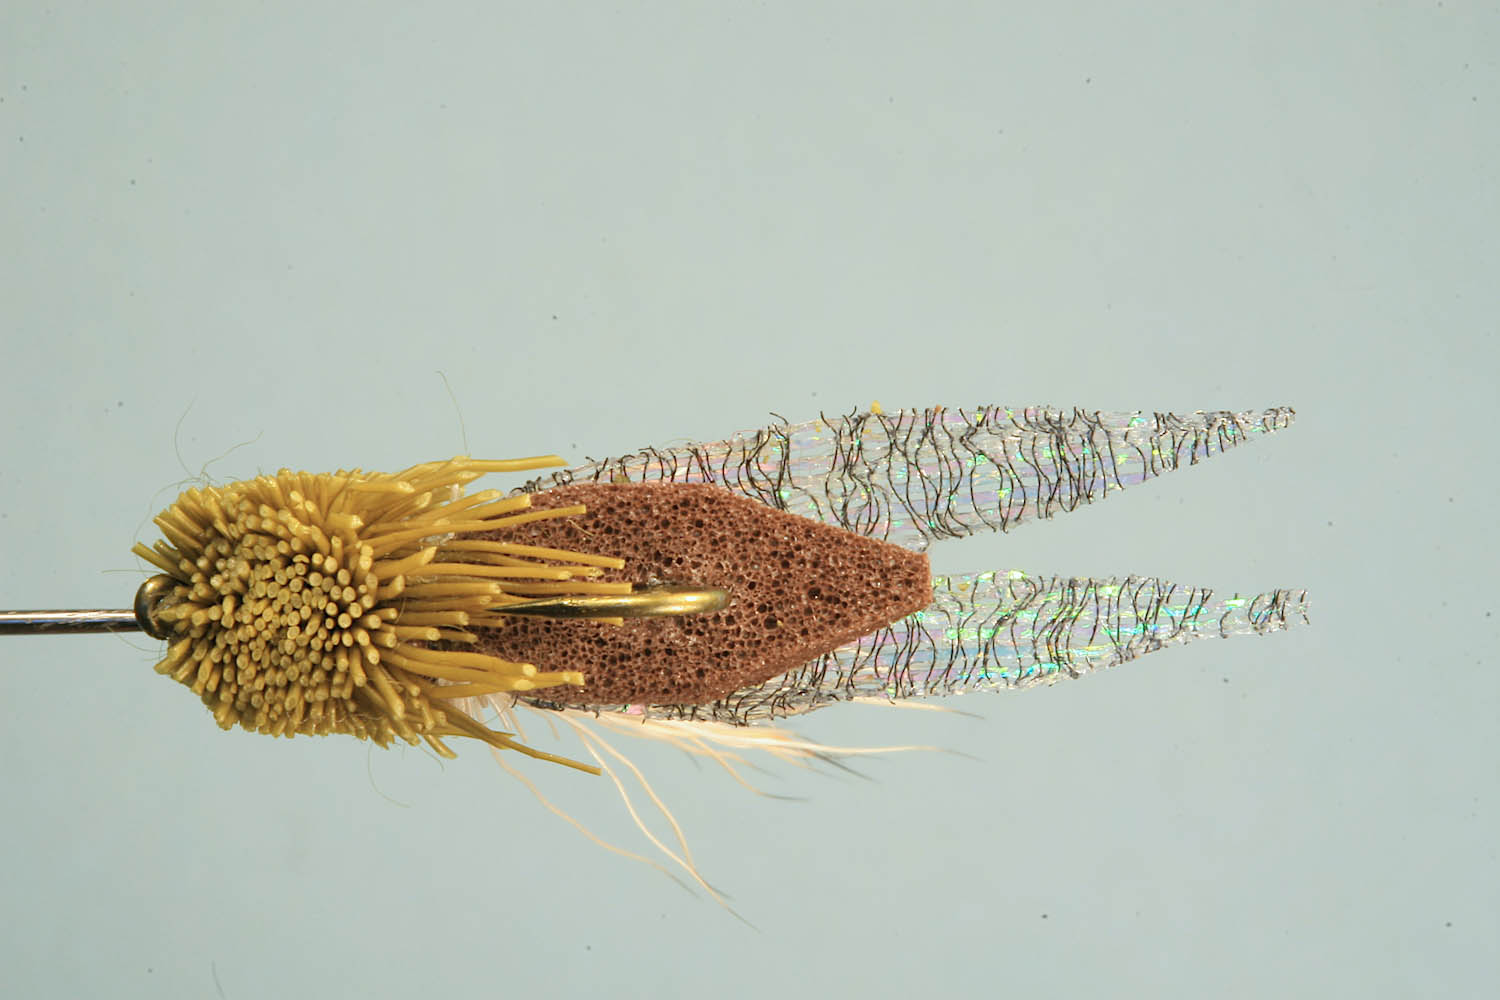
Silicone Wing Cicada - size 12
HOOK: TMC 100 size 12 or TMC 921 #10
THREAD: Olive or green UTC 140 denier
ABDOMEN: A foam cylinder of medium density, 1.2 cm long and 5.5 mm in diameter, in tan, brown or black.
If you do not have a foam cylinder, see my instructions for cutting your own >
WING: Two 5mm wide and 2.0cm cm long strips of silicone wing or one single piece 9mm wide and 25mm long. (How to make the silicone wing material follows after the tying steps.)
OVER WING: Natural yearling elk.
THORAX: Light olive or green deer hair
LEGS: A few strands of deer hair trimmed long.
Note: the TMC 921 # 10 has the same shank length as a TMC 100 #12, with the result that one achieves the same proportions but with larger hook gape.
Tying Steps
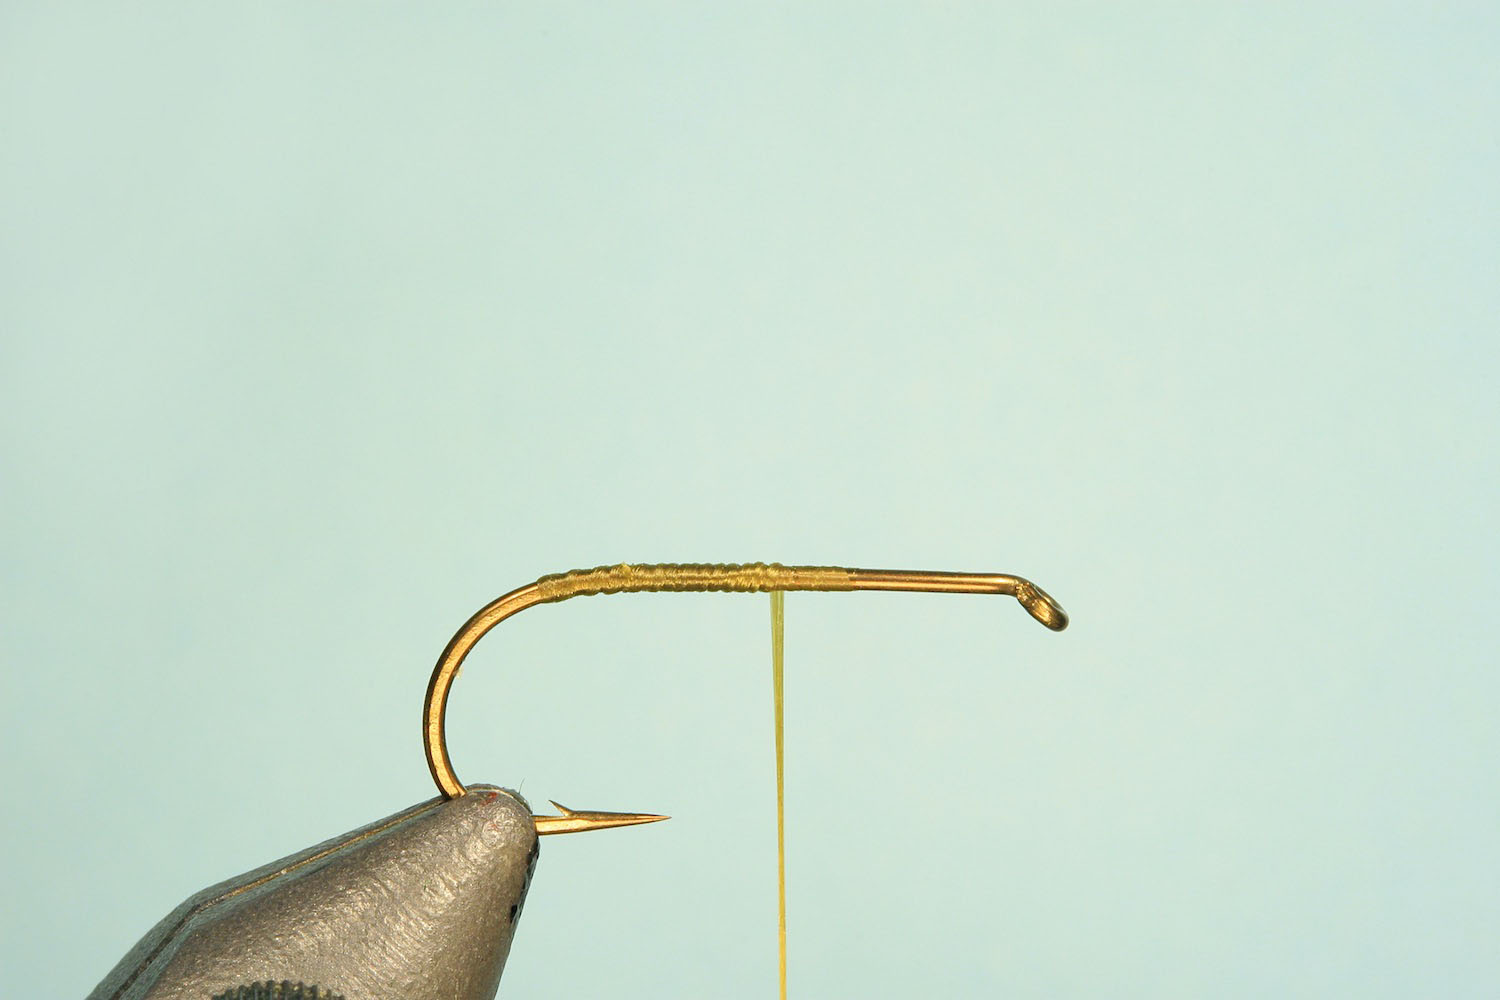
Step 1
Fix hook the hook in your vice and cover the back half of the shank with thread, returning to the half way mark.
Trim the abdomen of foam cylinder according to instructions below.
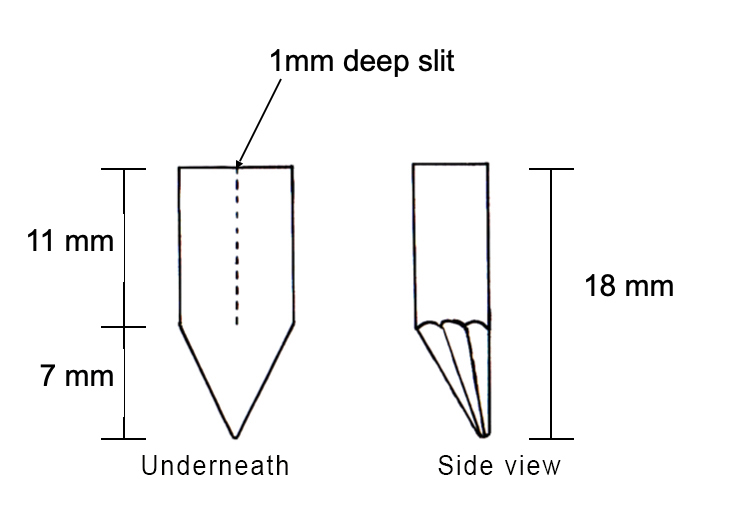
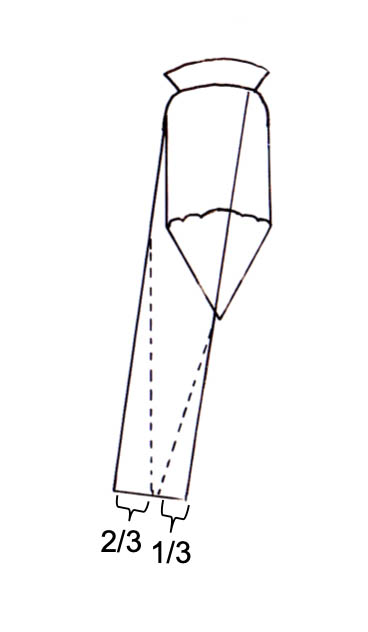
Trimming the Foam Cylinder
Split foam cylinder with a pair of scissors, so that one 'half' is slightly thicker than the other.
Trim the thicker piece with scissors as in above diagram.
Cut a 1mm slot with a razor blade in the underneath surface, as indicated.
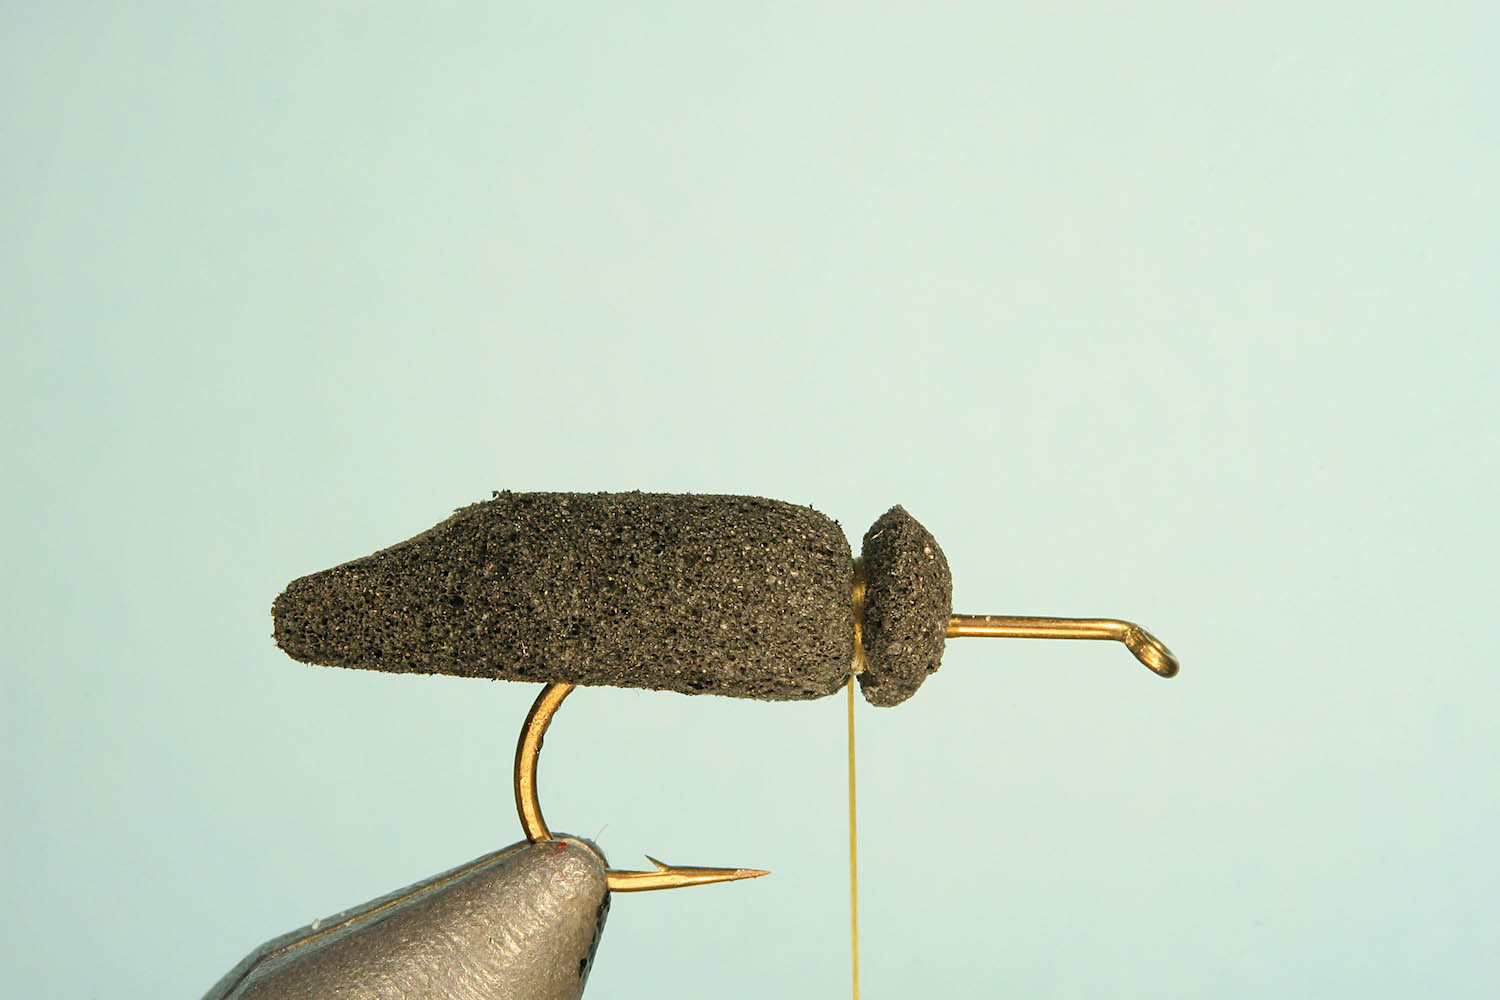
Step 2
Tie in the foam abdomen with three turns of thread using medium tension, about 1mm of foam should project forward of the tie in (the front third of the shank should be available for the thorax). Draw wraps tight by pulling on the thread and then add six more tight turns.
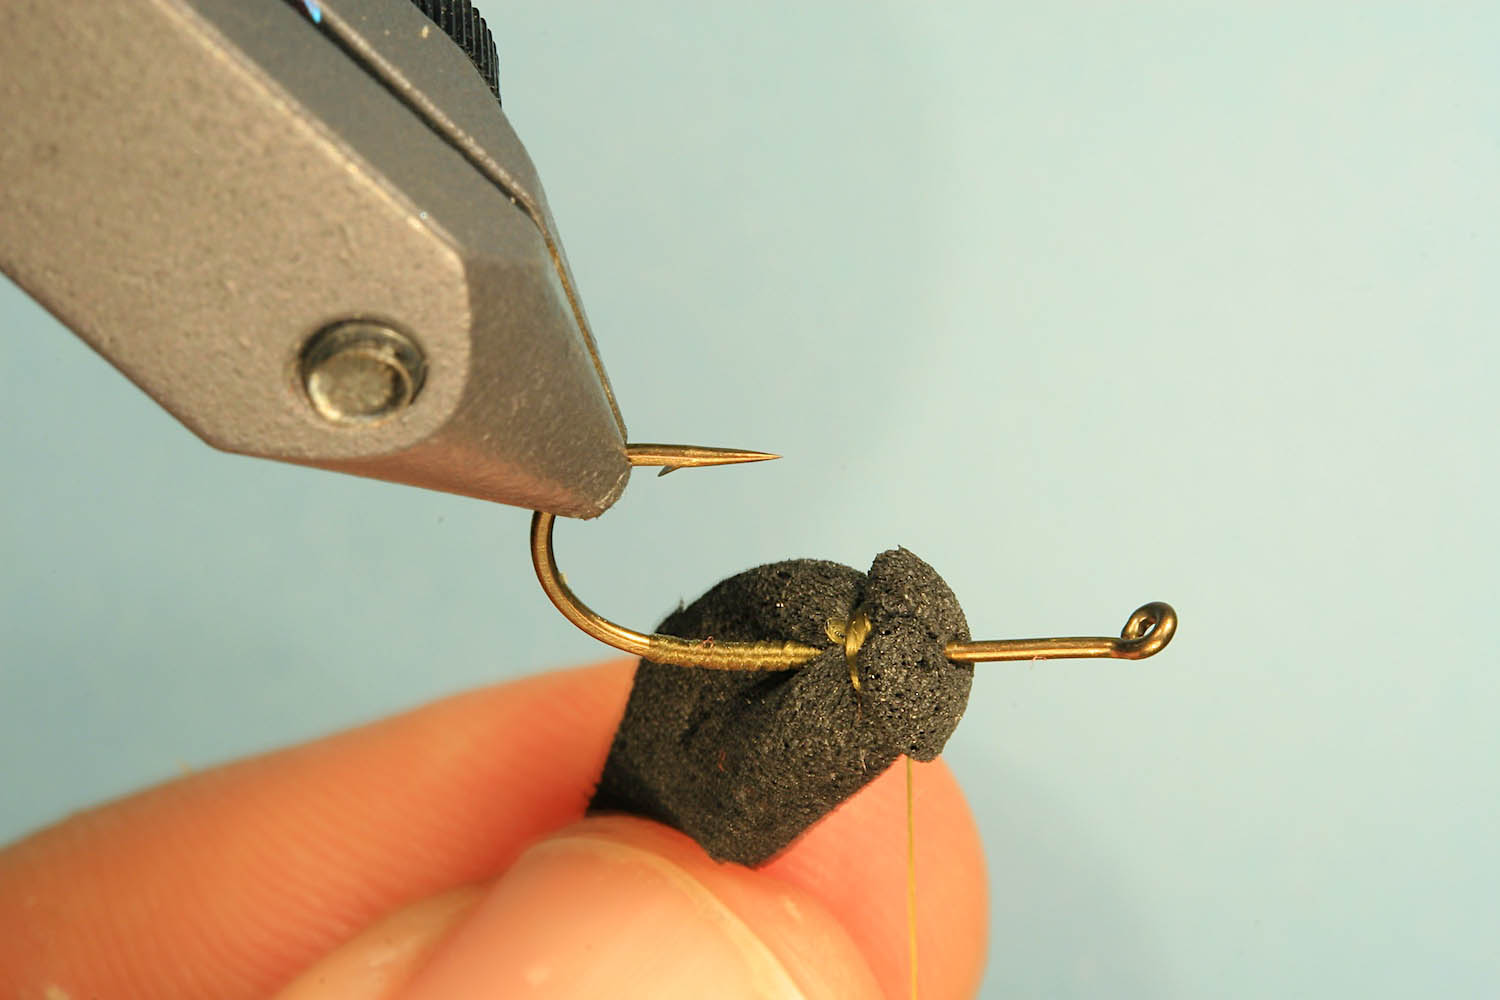
Step 3
Turn the fly upside down, and while lifting abdomen away from shank, cover shank and under-surface of thread wraps with super glue. Then work the shank into the foam slot by wriggling the abdomen.
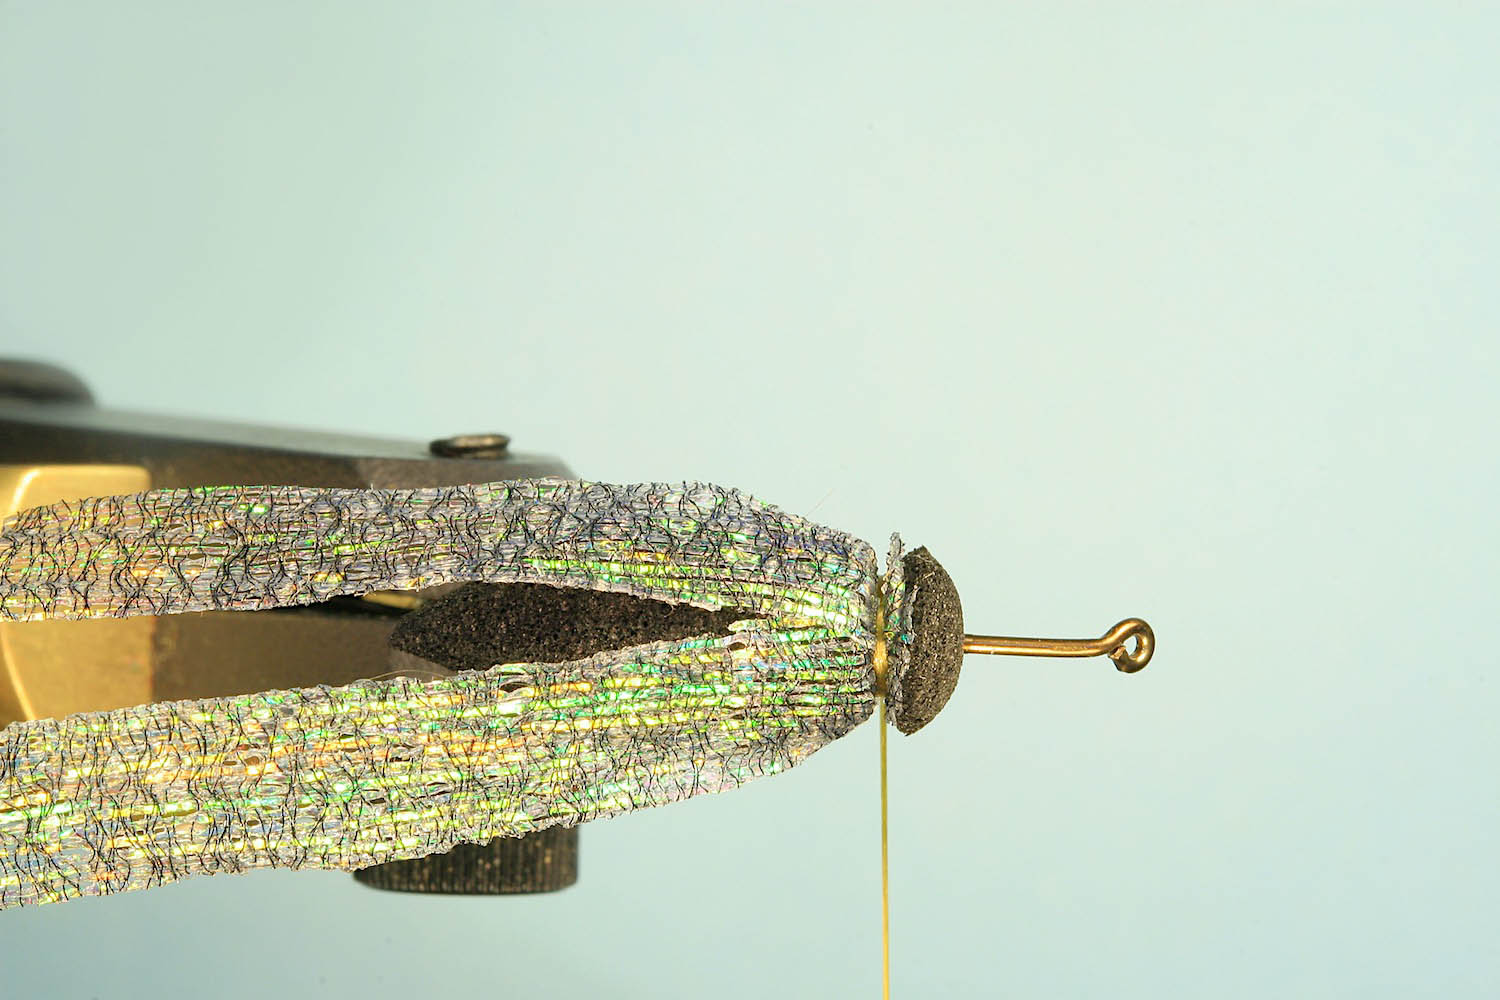
Step 4
There are two options for creating the wings :
| a. | Two separate strips of wing material, as in Step 4 above. Tie in wings one at a time - each with three tight turns of thread. Ensure the lower edges of the wings, on each side, are approximately 1mm above and parallel to the lower edge of the foam abdomen. Ensure 2mm of wing material projects forwards of the wraps.
|
|---|---|
| b. | A single piece of wing material as in Step 10 below. When creating the wing from a single piece of material, fold the rectangle of wing material in half to create a crease along the mid-line. Then secure it with three tight turns of thread, ensuring 2mm of wing material projects forward of the wraps. |
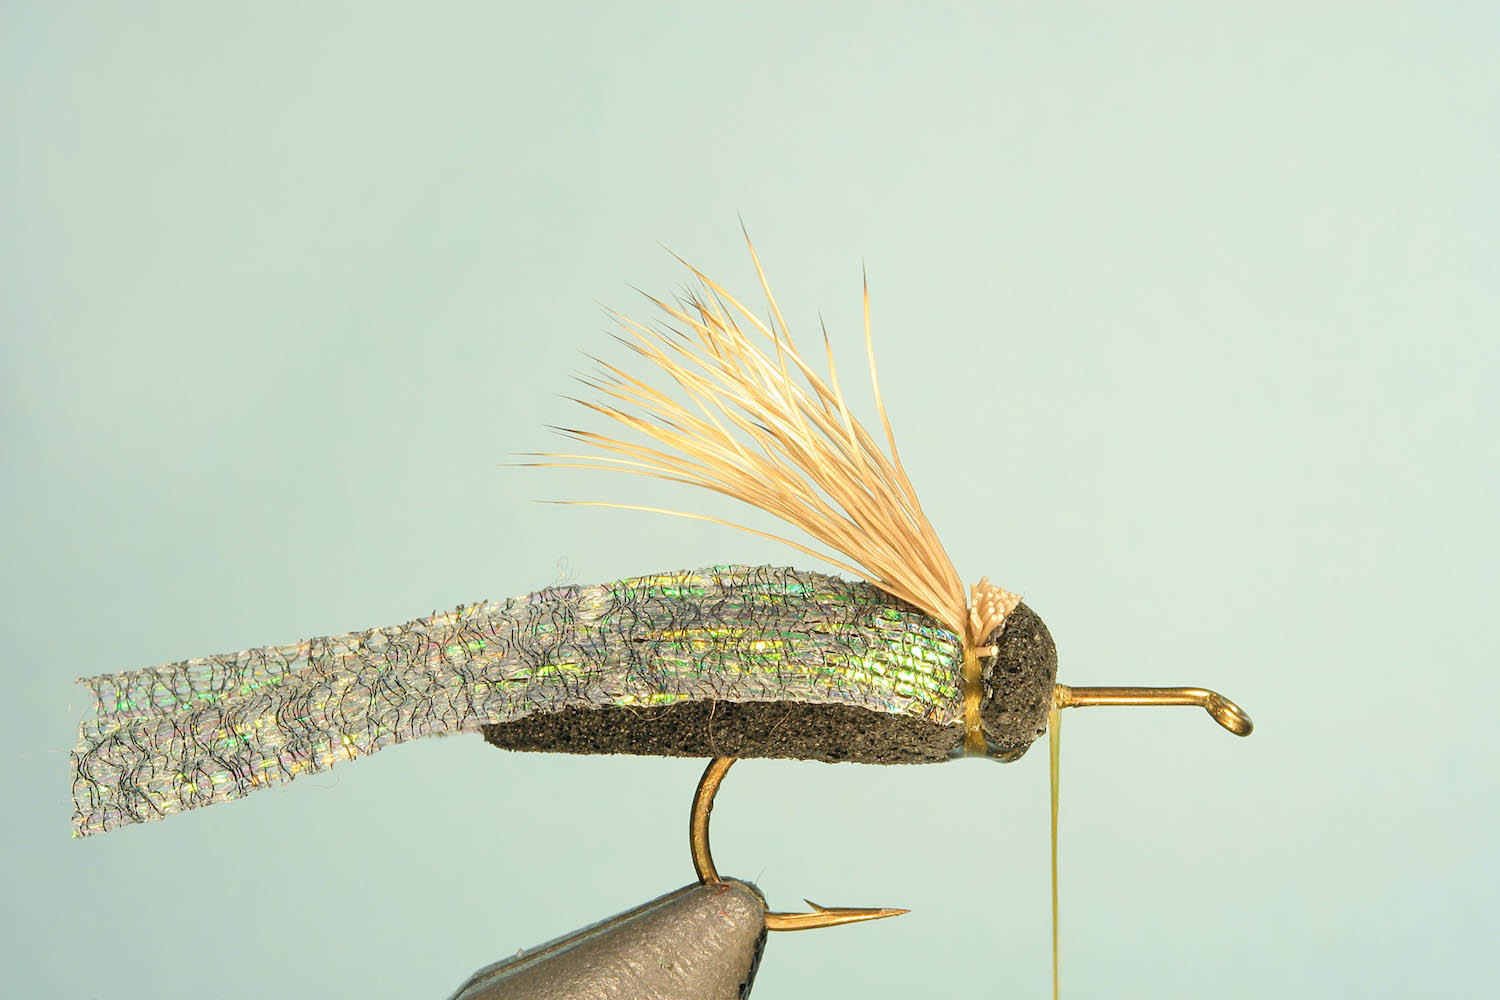
Step 5
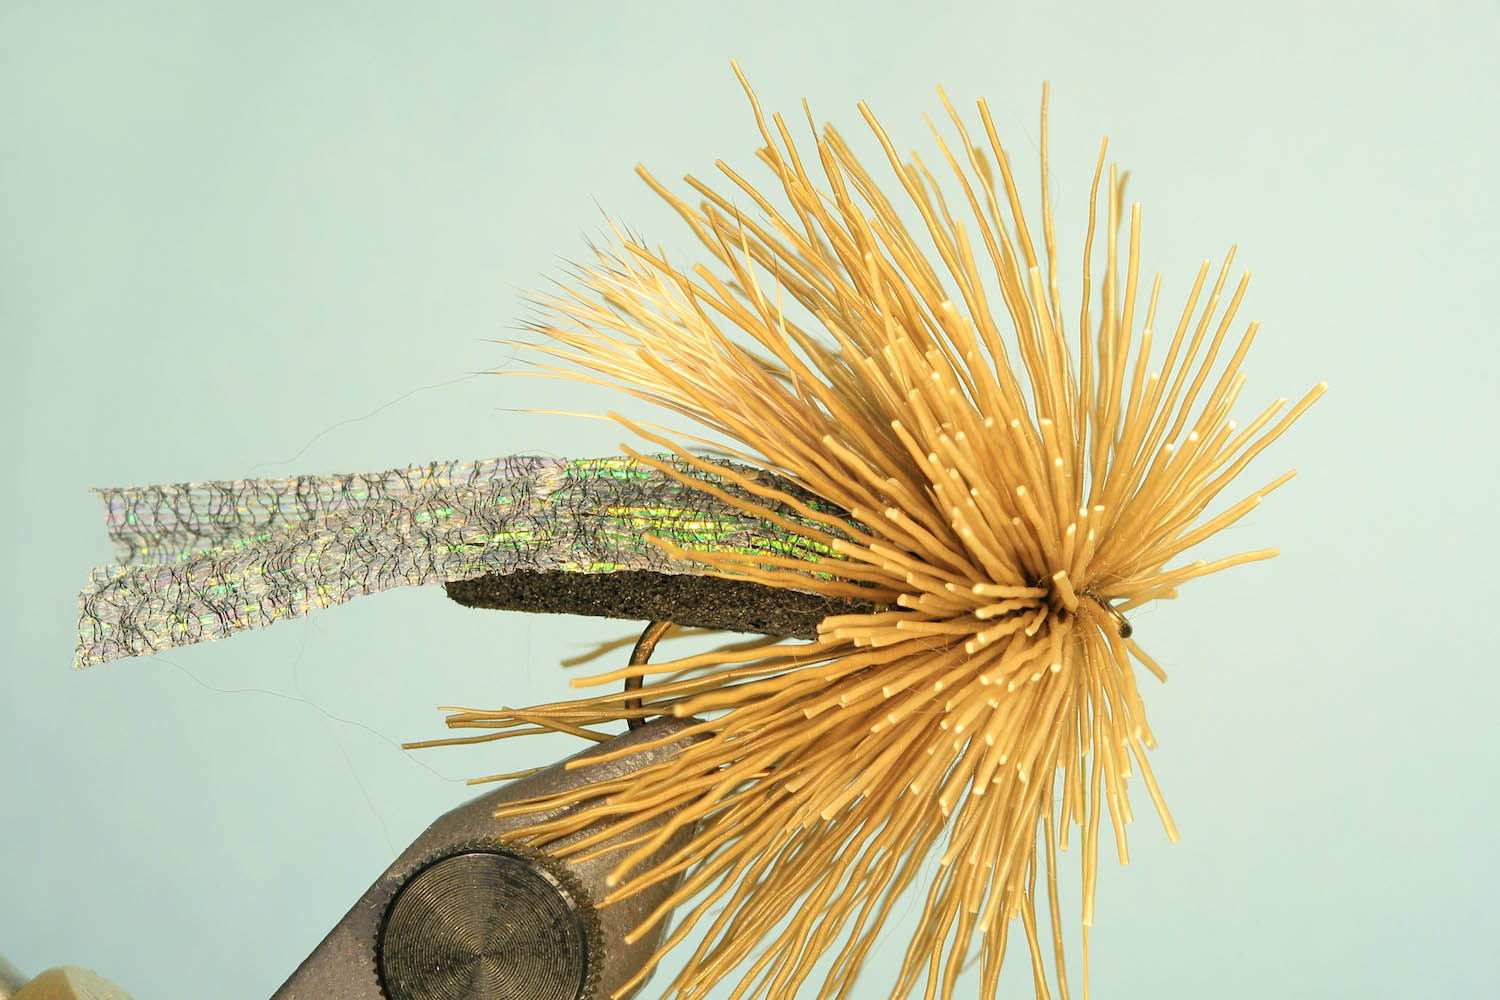
Stack a clump of elk hair, then tie it in with four tight thread turns so the over-wing is slightly shorter than the abdomen. Trim the excess elk. Advance the thread and make two half hitches around the shank immediately in front of the foam.
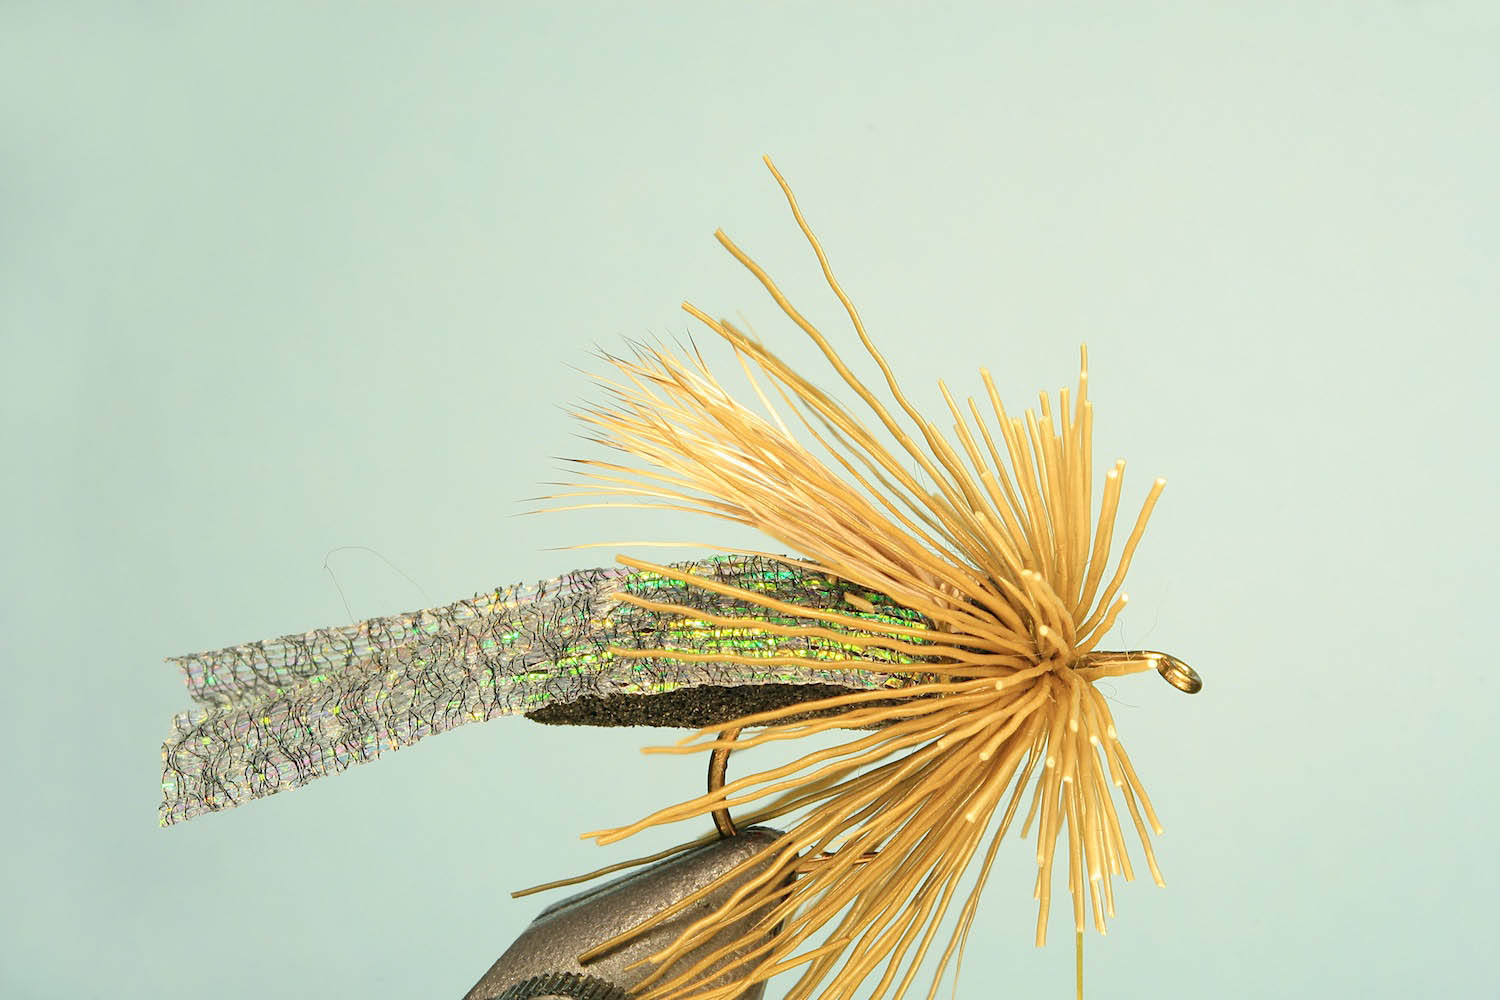
Step 6
Cut a clump of olive deer hair a little thinner than the thickness of a pencil, remove the fuzz from the butt end and clip away the tips (do not stack). Place atop hook and take three loose turns of thread around the middle of the thick portion, still gripping the hair between thumb and forefinger.
Draw thread wraps tight, at the same time releasing the hair so that it spins around the shank. Pack the spun hair tightly with hair packer. Bring thread forward through hair and while holding spun hair back with thumb, index and middle fingers of left hand make one tight turns of thread followed by two half hitches to lock the hair clump and then add a drop of varnish.
Step 7
Repeat previous step until shank between foam and eye is completely covered (usually 3 to 4 clumps of hair). Tie off after packing the final clump.
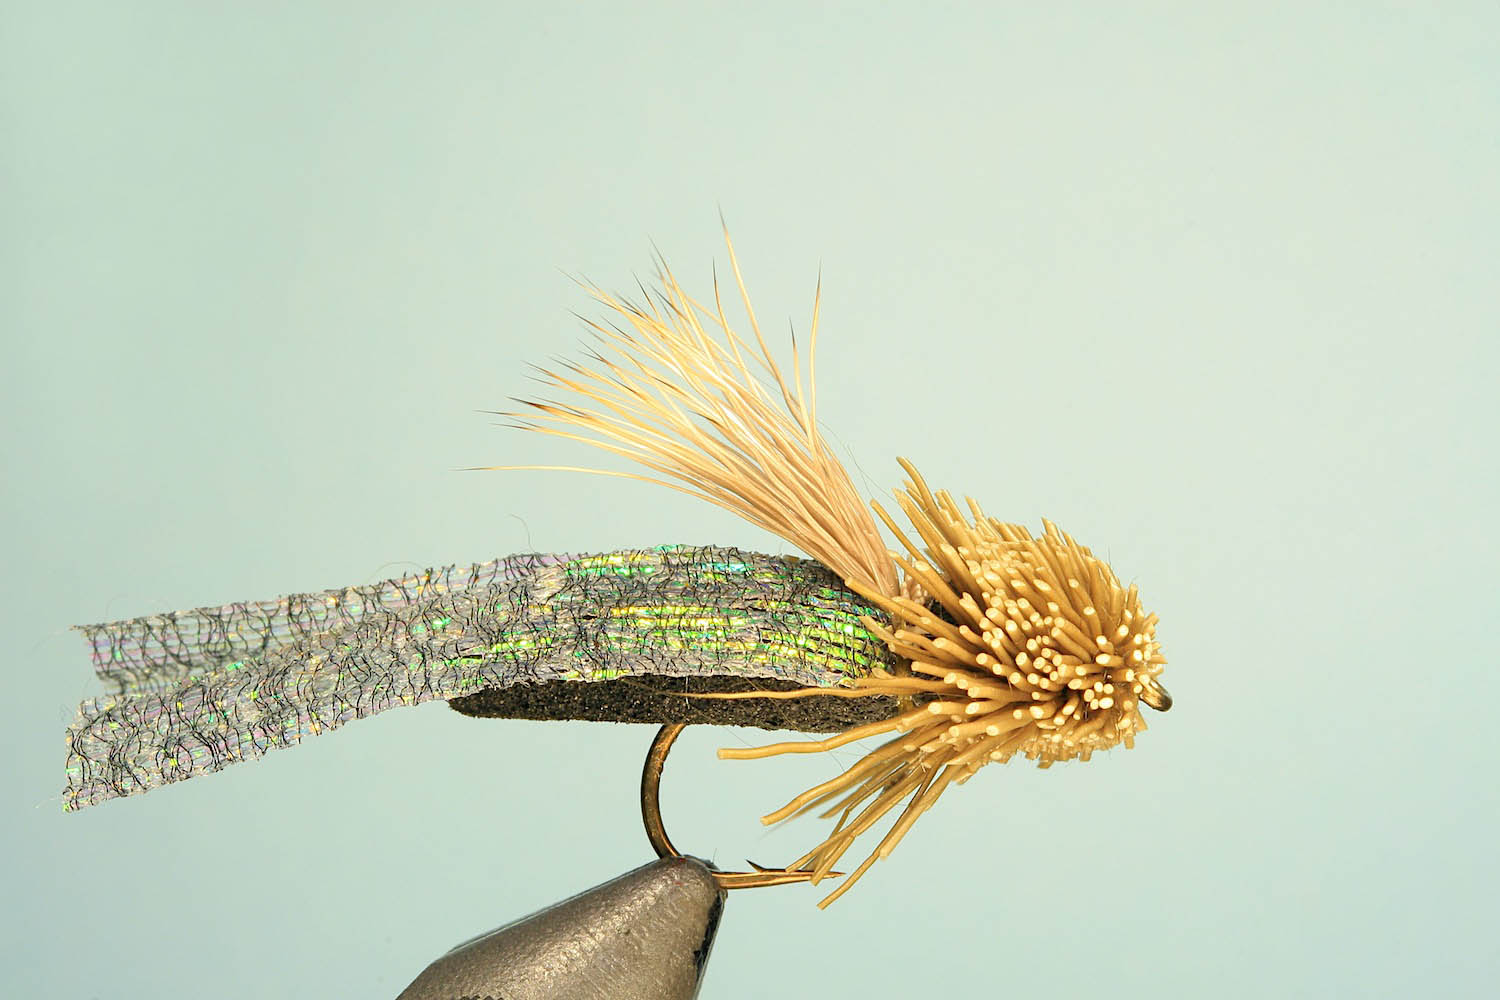
Step 8
Remove fly from vice and trim spun deer hair with scissors to resemble natural. Start off by trimming the front three quarters of the under surface flat. Trim the remaining quarter of the under-surface first to a length of about 1cm then haphazardly trim away patches until 10 or 12 long hairs remain to resemble the prominent olive legs of the natural.
Step 9
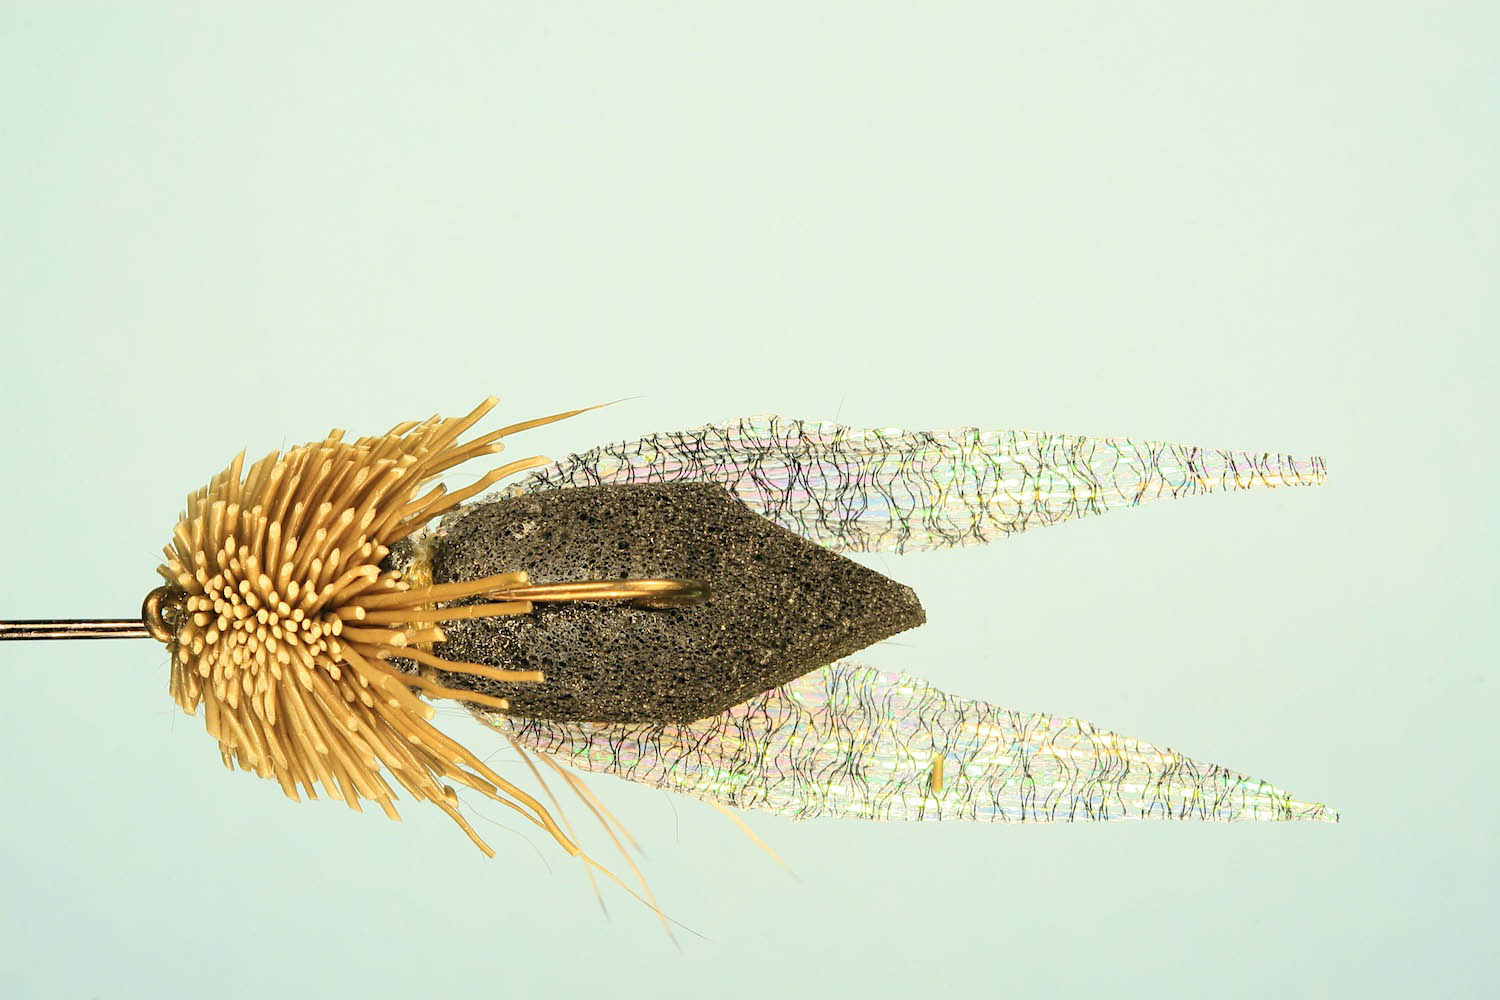
When using two strips of corrugated wing material, trim according to diagram below.
Step 10
When using a single piece of wing material, trim according to photograph above.
Size 12 Silicone Wing Cicada
Preparing wing material:
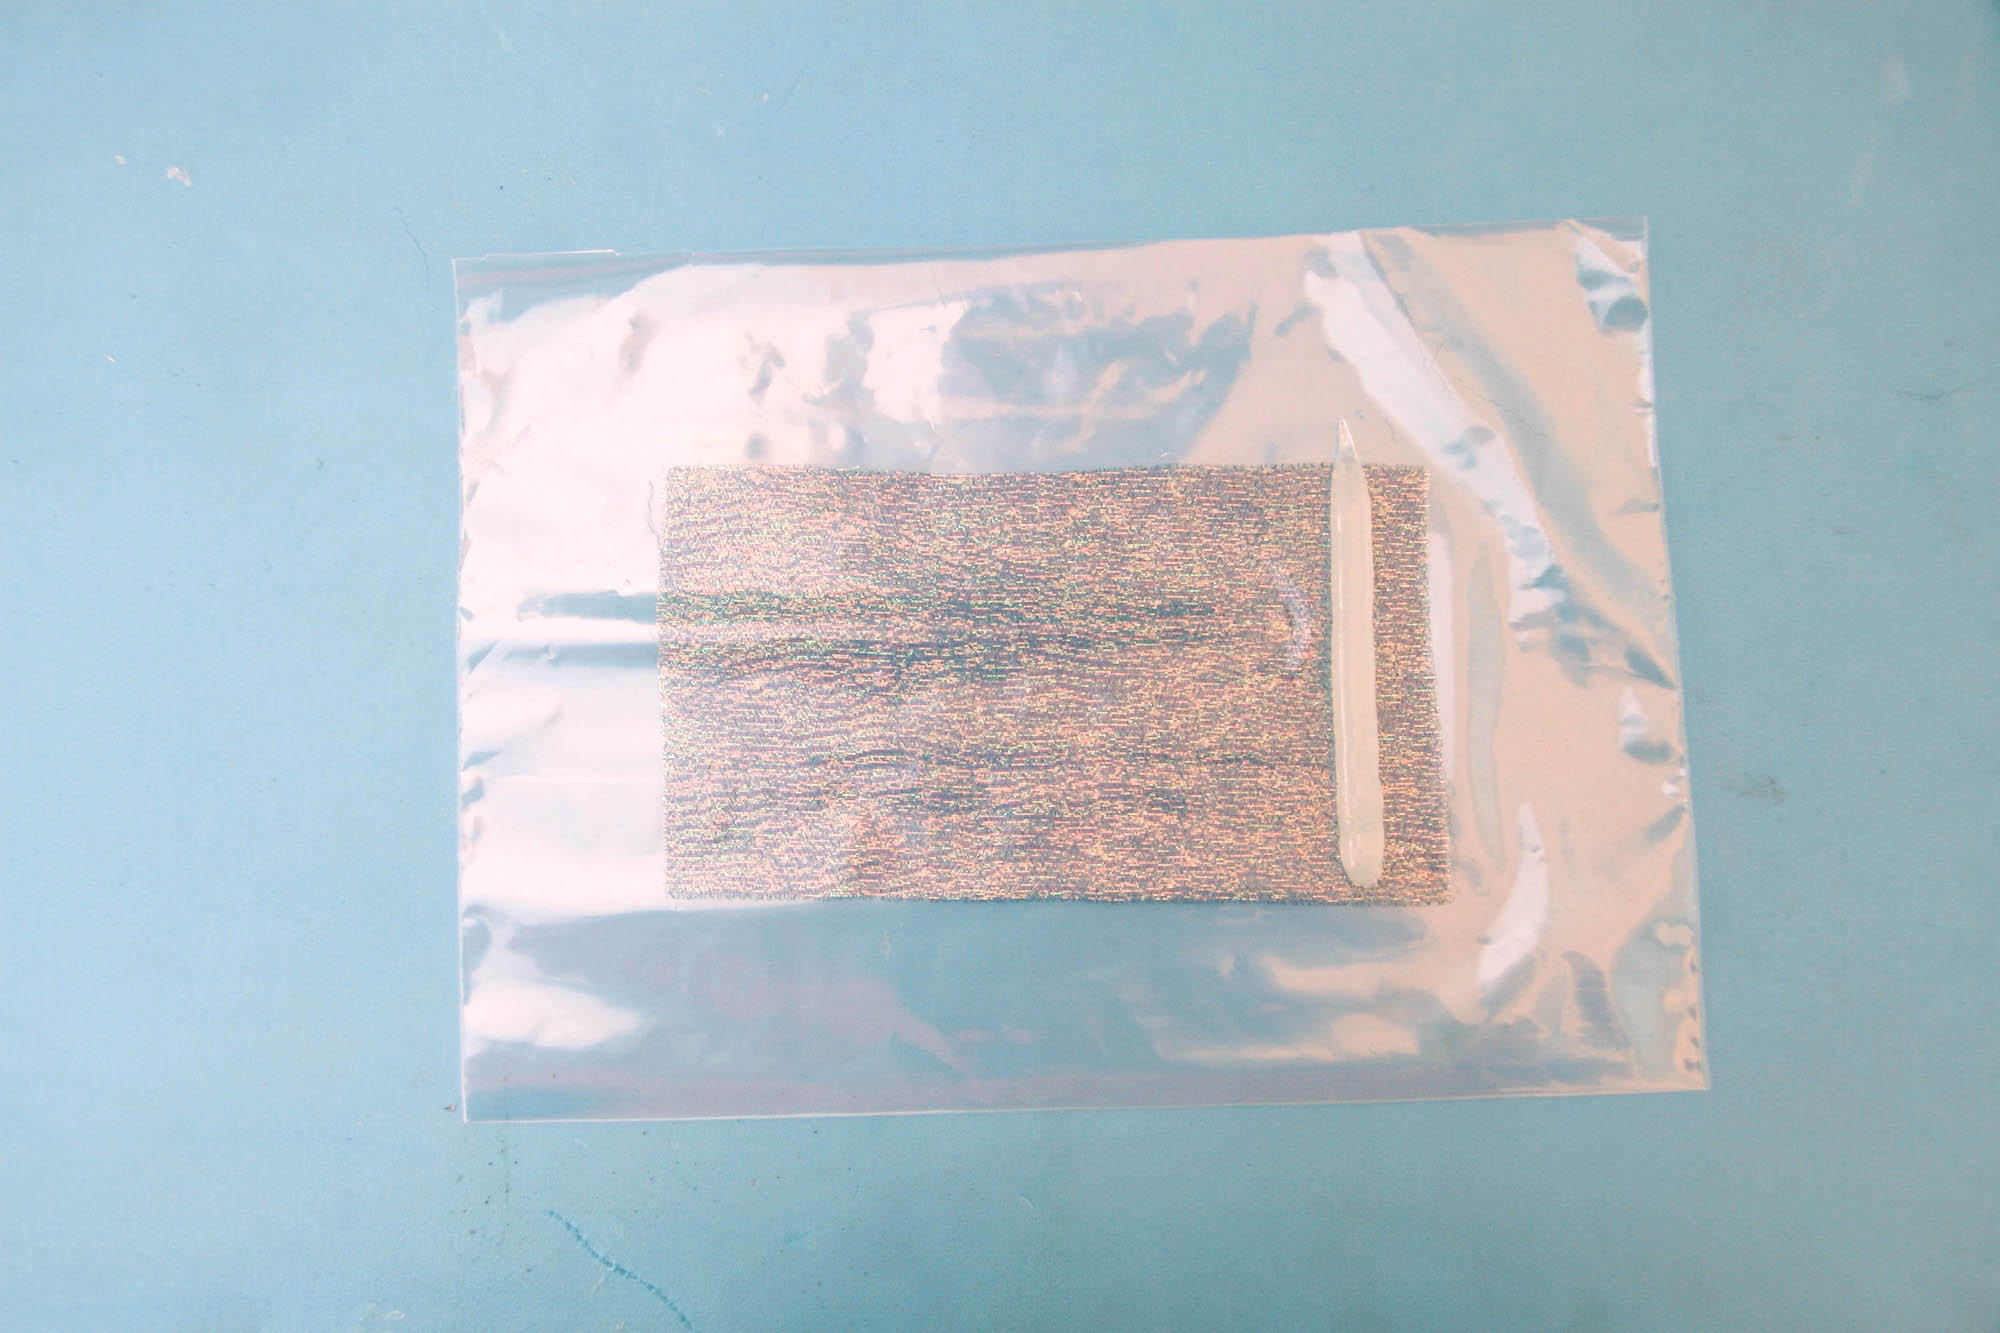
Step 1
The mylar fibres all run in the same direction while the black organza is woven at right angles to the Mylar.
Cut a piece of organza about 15cm long and 10cm wide, with the mylar fibres running between the short edges.
Place this on a sheet of clear plastic on top of e.g. a foam mat about 5-10mm thick.
Run a thick bead clear silicone rubber sealant, of approx 6-7mm, down one of the short edges.
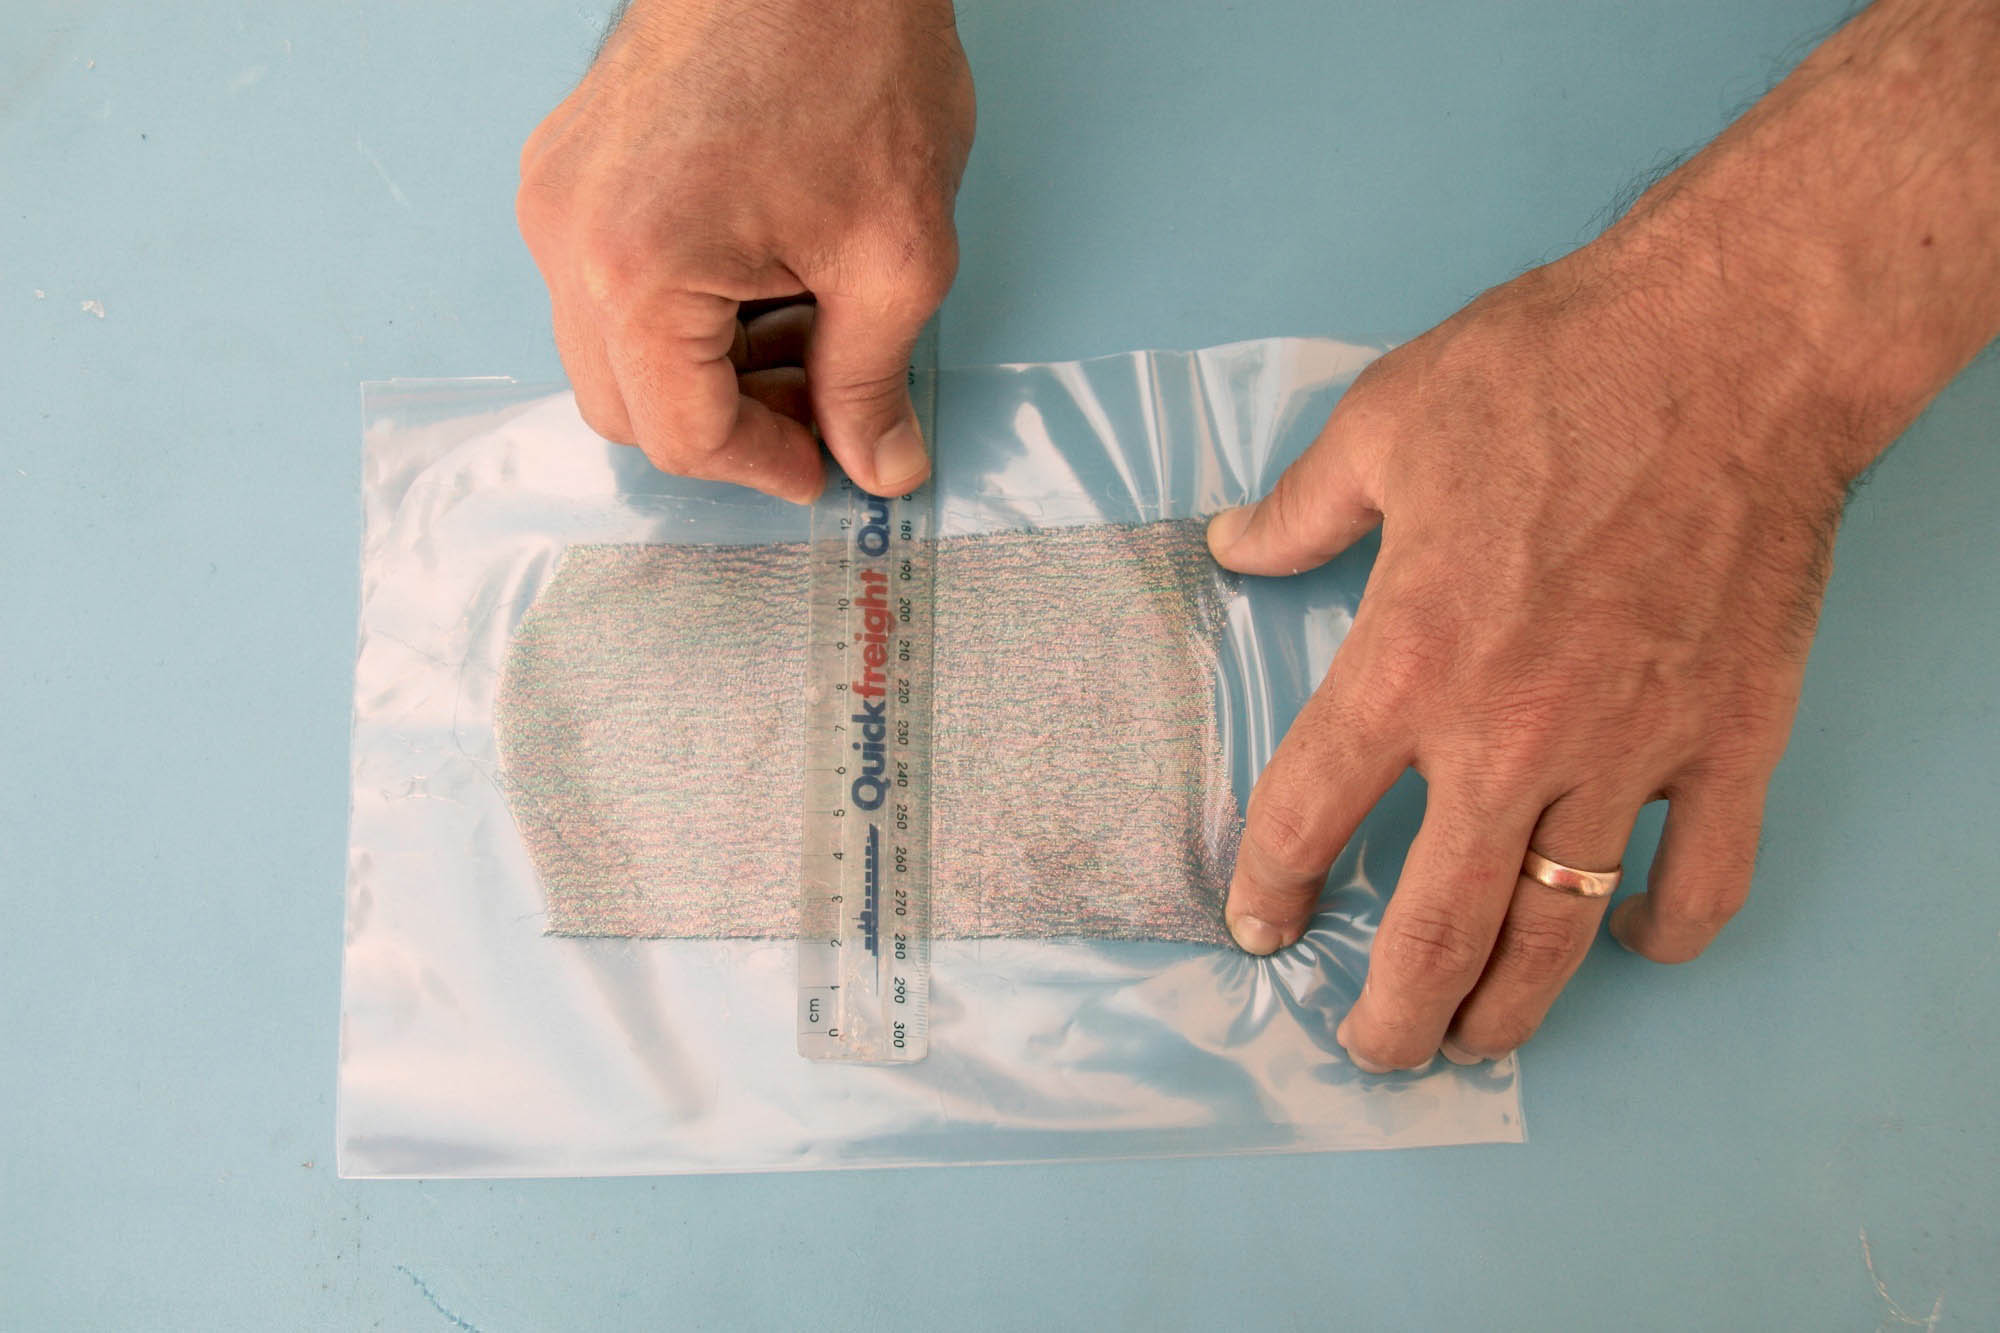
Step 2
With a plastic ruler, angled forward, spread the sealant thinly and evenly with three or four firm continuous strokes along the length of the material.
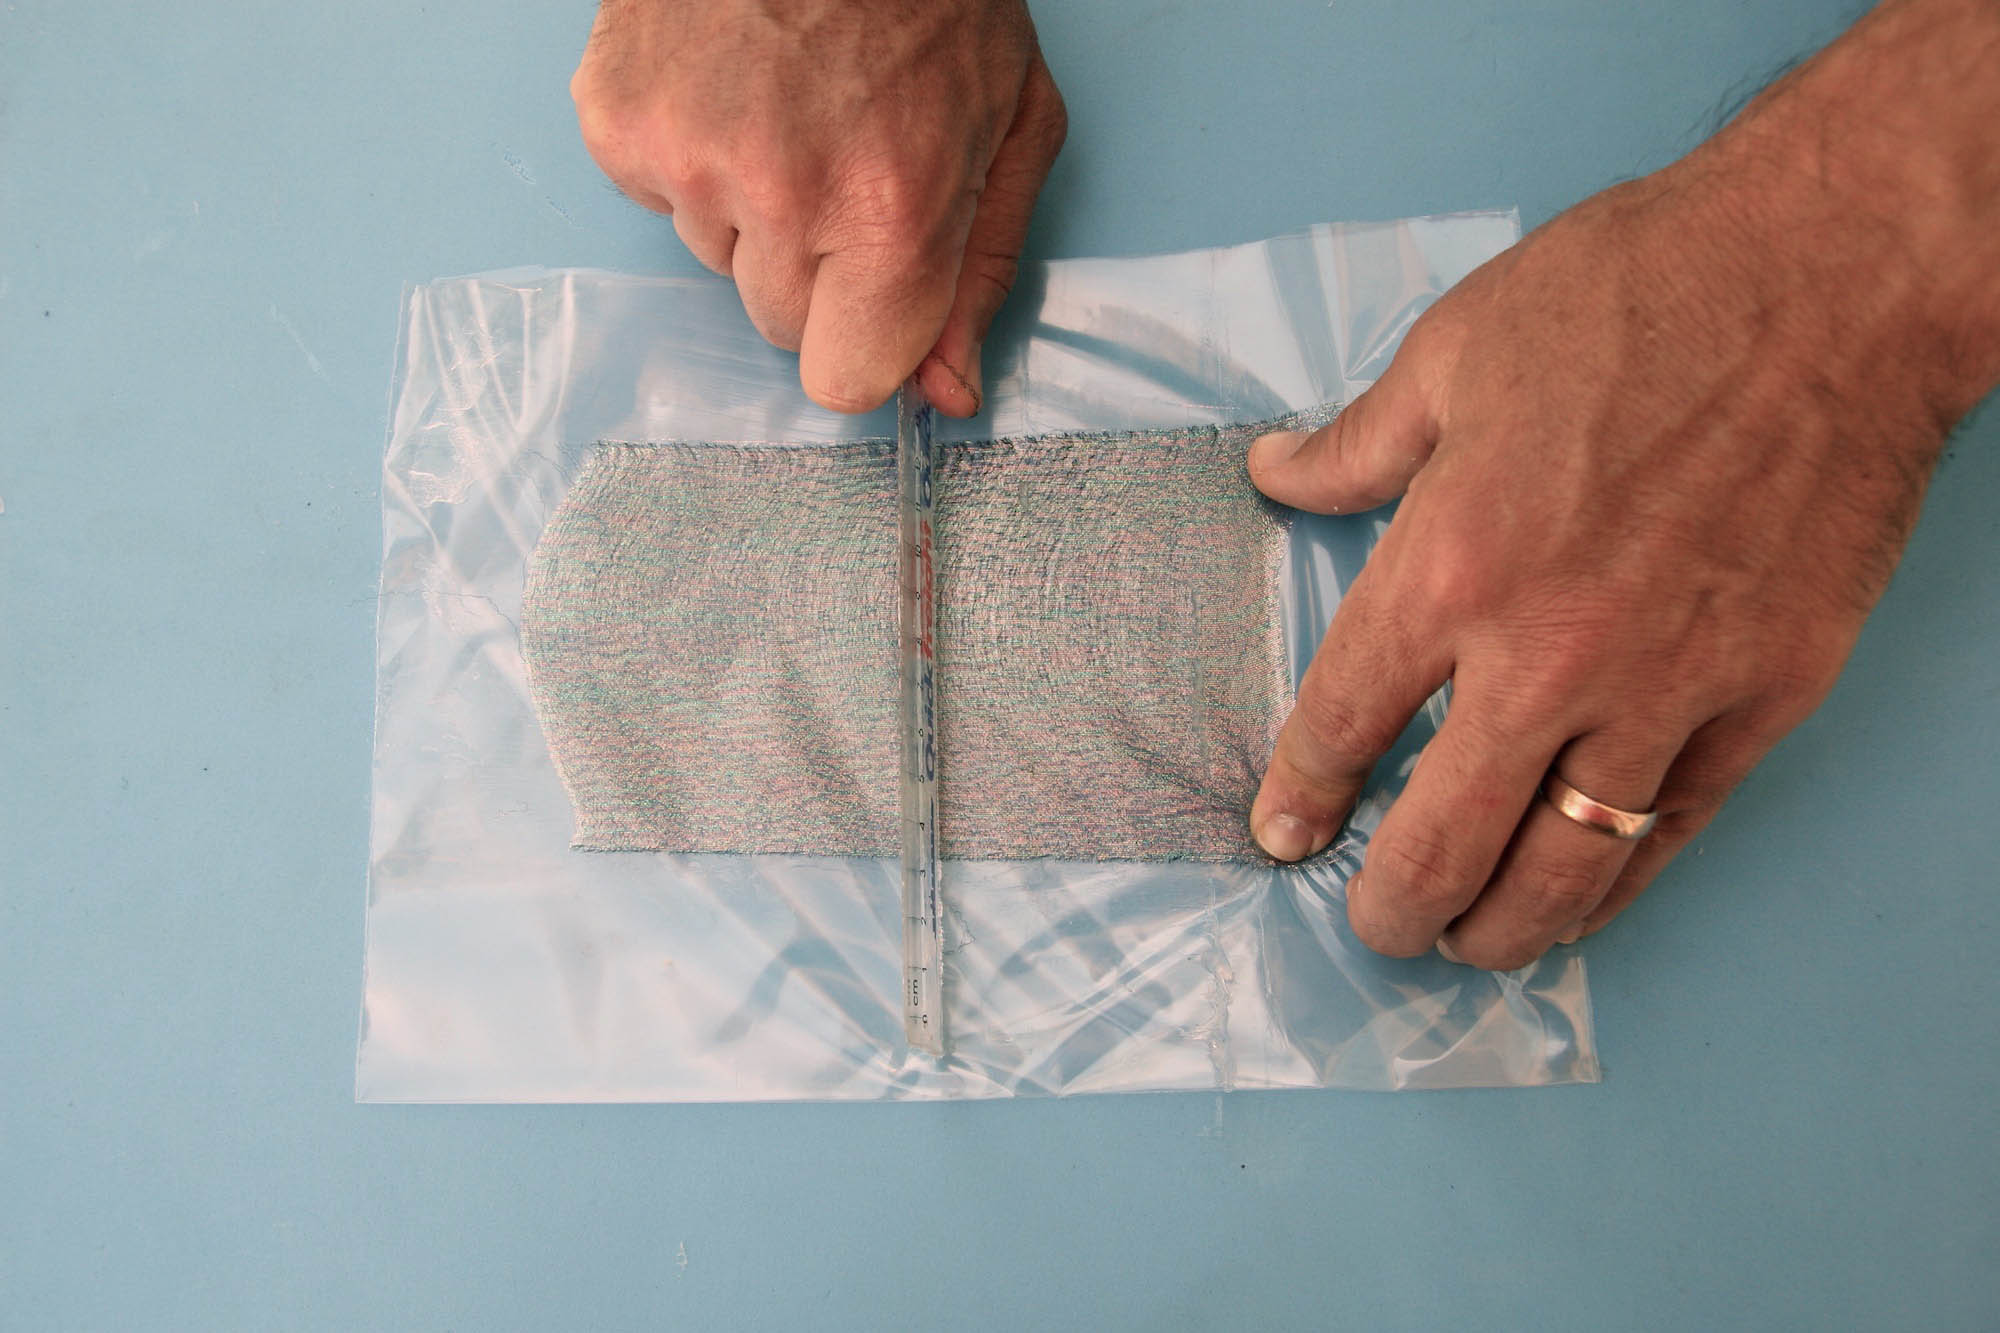
Step 3
Holding the ruler vertical to the material, make three more passes along the length of the material to remove the excess silicone - wiping the ruler clean after each stroke. A coating of silicone that is too thick produces wings that are floppy, heavy and flap noisily when cast.
Step 4
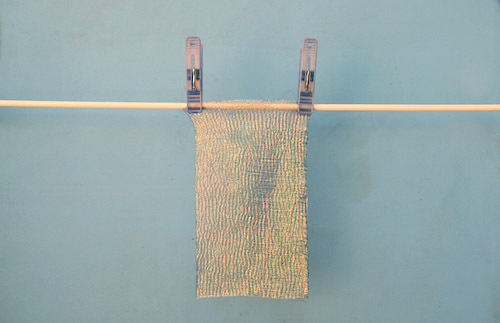
Peel the coated piece of Mylar Organza from the plastic and hang in a dust free environment overnight to dry.
Once dry, store the material flat.
When needed it can be cut into strips with a ruler and razor blade.
+ Effective Spey flies for New Zealand Trout and techniques for fishing them
+ Evolution of the Swing Minnow - A deadly Trout Spey Streamer
+ Introduction to wonders of Stretch Cord
+ Jelly Midge
+ Jelly Bloodworm and Jelly Grub
+ Jelly Caddis
+ Jelly Leg Colly
+ Jelly Bellow Minnow
+ Jelly Crimp Nymph
+ Hot Foam Hopper
+ Hare's Mask Darter
+ Silicone Wing Cicada - Designing the Fly
+ Gurgle Pop Minnow
+ Cutting your own Foam Cylinder